Cafe Bazaar In-App Payment Tutorial
To get started, go to the Cafe Bazaar website and log in to your developer panel. If you haven't registered as a developer on Cafe Bazaar yet, read the following tutorial: Tutorial on Publishing Your App on Cafe Bazaar Export your application from ServerNet and go to your user panel on Cafe Bazaar, upload your app's APK file, but do not request its publication. To learn about downloading the app, read the following tutorial: App Download Tutorial In the Cafe Bazaar payment panel, go to the "In-App Payment" section.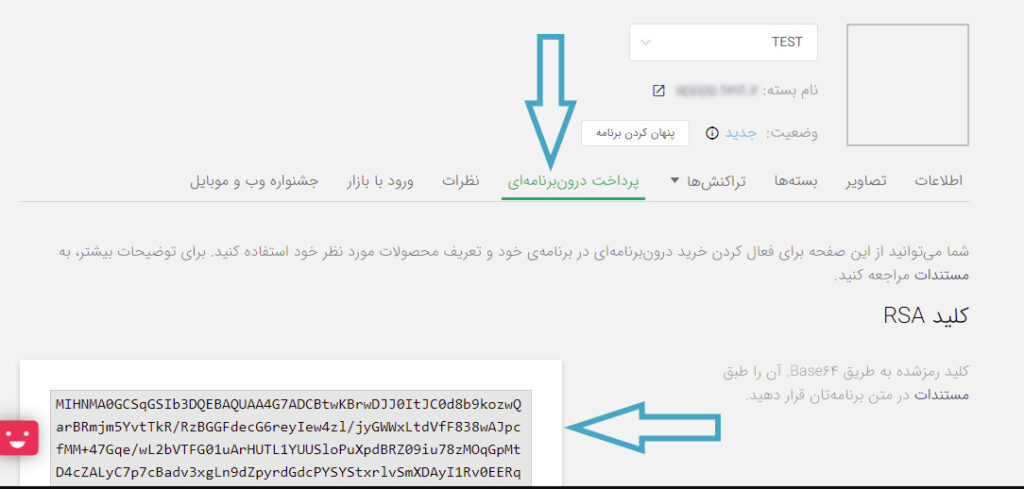 Cafe Bazaar In-App Payment Tutorial
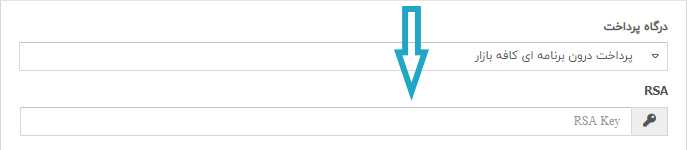
Copy the RSA key and place it in the plugin where you intend to set up the Cafe Bazaar gateway. Note that after copying this key, extra characters such as spaces, etc., especially around it, are not copied.
Cafe Bazaar In-App Payment Tutorial
Copy the RSA key and place it in the plugin where you intend to set up the Cafe Bazaar gateway. Note that after copying this key, extra characters such as spaces, etc., especially around it, are not copied.
 Cafe Bazaar In-App Payment Tutorial
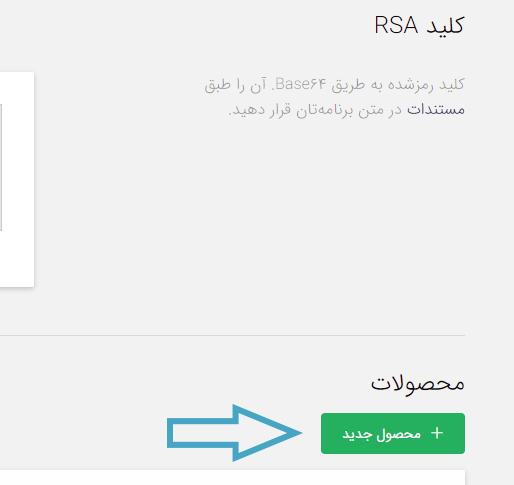
Now click on the "New Product" option.
Cafe Bazaar In-App Payment Tutorial
Now click on the "New Product" option.
 Cafe Bazaar In-App Payment Tutorial
You will see the following list.
Cafe Bazaar In-App Payment Tutorial
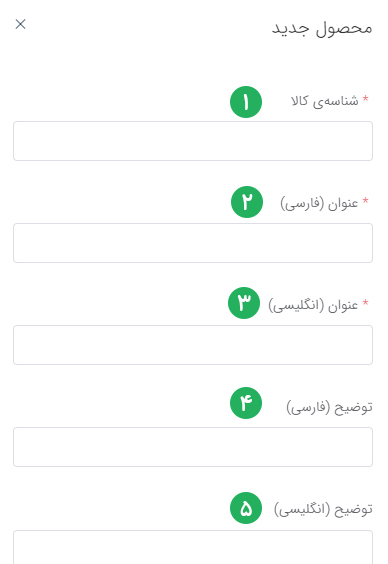
You will see the following list.
 Cafe Bazaar In-App Payment Tutorial
1- In this section, enter the product ID. It must be in English. For example, EnglishBook1
2- In this section, enter the Persian title of the product, for example: The third and fourth sections of the Orange Language Book
3- In this section, enter the English title of the product.
4- In these fields, you can write a Persian description for this product.
5- In these fields, you can write an English description for this product.
6- In this section, enter the price.
7- Activate the status.
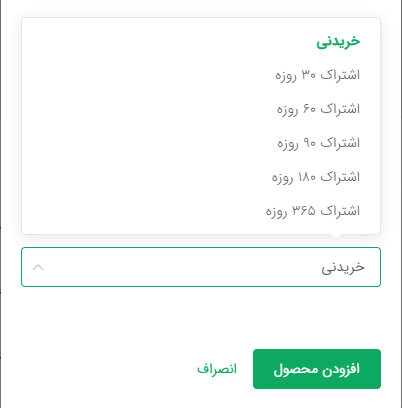
8- The product type must be set to purchasable. If you intend to define user subscription types as time-based in the user account plugin, you need to select other options according to your needs.
Cafe Bazaar In-App Payment Tutorial
1- In this section, enter the product ID. It must be in English. For example, EnglishBook1
2- In this section, enter the Persian title of the product, for example: The third and fourth sections of the Orange Language Book
3- In this section, enter the English title of the product.
4- In these fields, you can write a Persian description for this product.
5- In these fields, you can write an English description for this product.
6- In this section, enter the price.
7- Activate the status.
8- The product type must be set to purchasable. If you intend to define user subscription types as time-based in the user account plugin, you need to select other options according to your needs.
 Cafe Bazaar In-App Payment Tutorial
Finally, click on Add Product.
After creating the product, log in to your panel on ServerNet and enter the product ID you created on Cafe Bazaar in the relevant plugin.
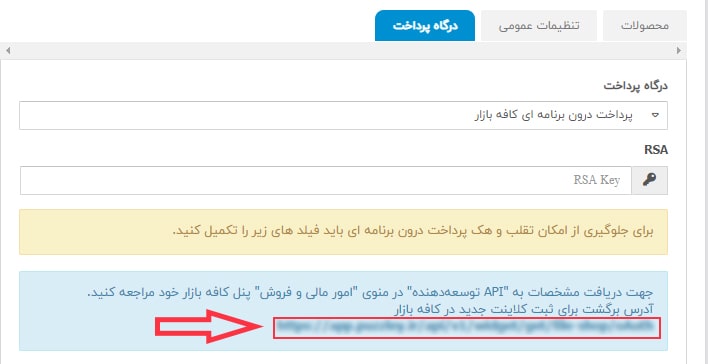
To prevent fraud and hacking of in-app payments, you must fill in the connection ID and connection secret fields. To do this, copy the return-to-app link.
Cafe Bazaar In-App Payment Tutorial
Finally, click on Add Product.
After creating the product, log in to your panel on ServerNet and enter the product ID you created on Cafe Bazaar in the relevant plugin.
To prevent fraud and hacking of in-app payments, you must fill in the connection ID and connection secret fields. To do this, copy the return-to-app link.
 Cafe Bazaar In-App Payment Tutorial
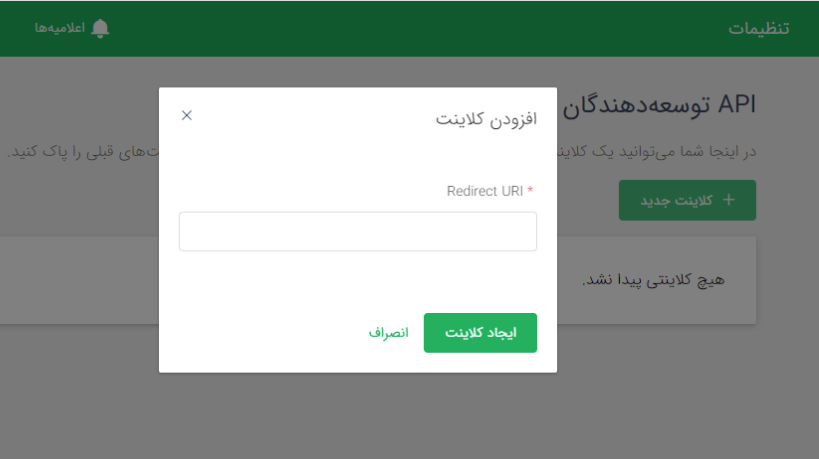
Now you need to go back to your user panel on Cafe Bazaar and click on the Developer API option on the right side of the panel, then select New Client. In the opened window, paste the return URL you copied from ServerNet and click Create New Client.
Cafe Bazaar In-App Payment Tutorial
Now you need to go back to your user panel on Cafe Bazaar and click on the Developer API option on the right side of the panel, then select New Client. In the opened window, paste the return URL you copied from ServerNet and click Create New Client.
 Cafe Bazaar In-App Payment Tutorial
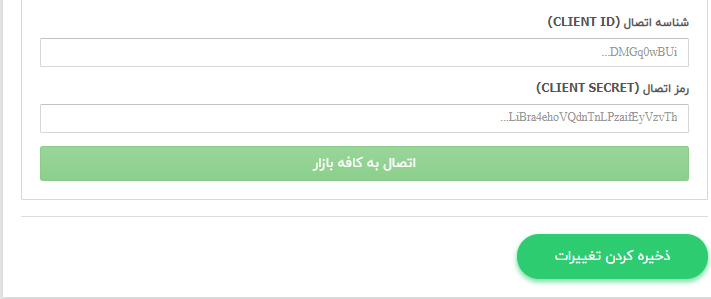
After creating the client, copy the Client ID and Client Secret and return to your user panel on ServerNet and enter them in the relevant fields.
Cafe Bazaar In-App Payment Tutorial
After creating the client, copy the Client ID and Client Secret and return to your user panel on ServerNet and enter them in the relevant fields.
 Cafe Bazaar In-App Payment Tutorial
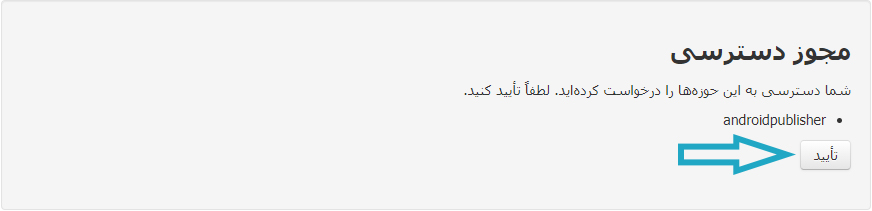
Now click on Save Information and then press the Connect to Cafe Bazaar button so that the green button changes to red.
Cafe Bazaar In-App Payment Tutorial
Now click on Save Information and then press the Connect to Cafe Bazaar button so that the green button changes to red.
 Cafe Bazaar In-App Payment Tutorial
The connection process is complete, and you can now download your app and upload it for publication on Cafe Bazaar.
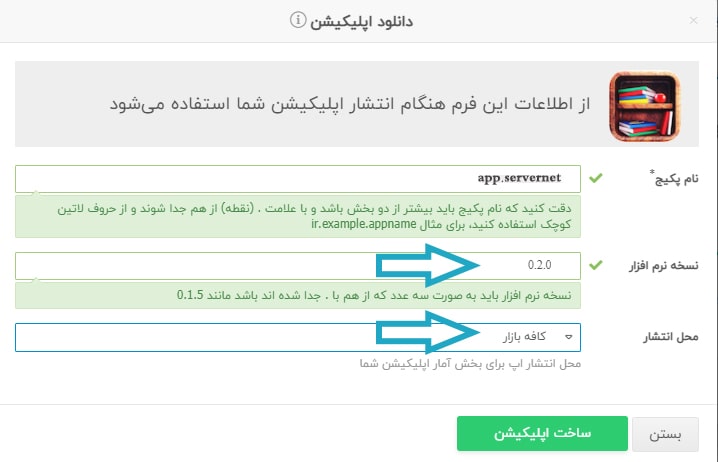
In the app download section, upgrade the application version. For example, if it was version 0.1.0, upgrade it to 0.2.0, and also select the publication location to get accurate Cafe Bazaar visit statistics, then generate the APK output.
Cafe Bazaar In-App Payment Tutorial
The connection process is complete, and you can now download your app and upload it for publication on Cafe Bazaar.
In the app download section, upgrade the application version. For example, if it was version 0.1.0, upgrade it to 0.2.0, and also select the publication location to get accurate Cafe Bazaar visit statistics, then generate the APK output.
 Cafe Bazaar In-App Payment Tutorial
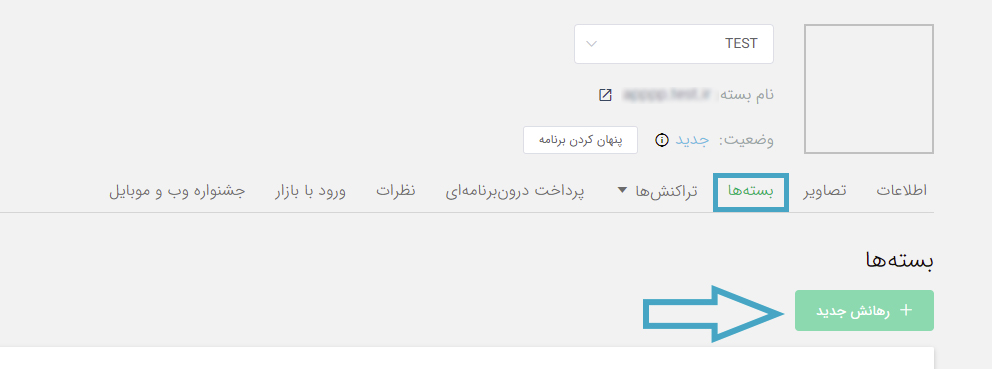
Now, in your user panel on Cafe Bazaar, go to the "Packages" section and upload the new version of the app you exported.
Cafe Bazaar In-App Payment Tutorial
Now, in your user panel on Cafe Bazaar, go to the "Packages" section and upload the new version of the app you exported.
 Cafe Bazaar In-App Payment Tutorial
Finally, click on the "Request App Publication" option so your app gets published on Cafe Bazaar.
Now your app has Cafe Bazaar in-app payment.
The Cafe Bazaar in-app payment tutorial has ended. You can now start building your app and publishing it on ServerNet App Builder.
Cafe Bazaar In-App Payment Tutorial
Finally, click on the "Request App Publication" option so your app gets published on Cafe Bazaar.
Now your app has Cafe Bazaar in-app payment.
The Cafe Bazaar in-app payment tutorial has ended. You can now start building your app and publishing it on ServerNet App Builder.
Yorumlar 0
Henüz yorum yok — ilk siz olun!